


Event Details

1. Click “Create event”.
Log in to your Jlive account and select “Create Event”.
2. Enter the Event Title
- Give your event a short, distinct name up to 72 characters long.
2. Insert a Main Image
- Size up to 5mb. PNG or JPG formats only.
- Minimum dimension is 960×600 px
- To delete your main event image, hover over the image and click the “trash bin” icon when it appears.
- Make sure to check the copyright licenses on the images you use.
PRO TIP
If you have an image that you need to resize, you can use free websites such as Canva.
Here is a link to the Jlive Event Art Template
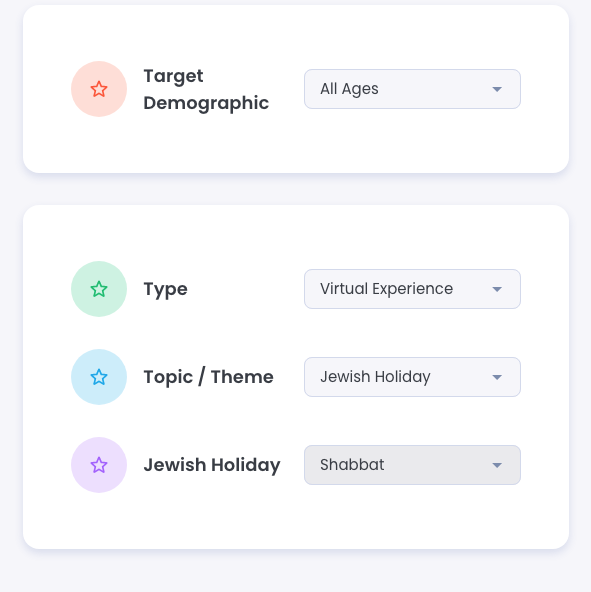
3. Choose Target Demographic
PRO TIP
Be strategic about the demographics use choose. Specific targeting works best. Please dont use “all ages” if it is not truly for toddlers- seniors.
4. Chose Event Type
5. Chose Event Topic / Theme
- Choose a category that matches your event. For Jewish holidays, there is a second drop-down menu to chose from.
- For public events, this helps attendees find your event.
6. Select Date and Time
- Select the date of the event
- Select the start time of the event
- Select the end time fo the event
- Time Zone — Set to match the region that matches your event.
7. Choose a location for an in-person event.
Venue — Use the search bar below “Venue” to search for a venue, address, or city.
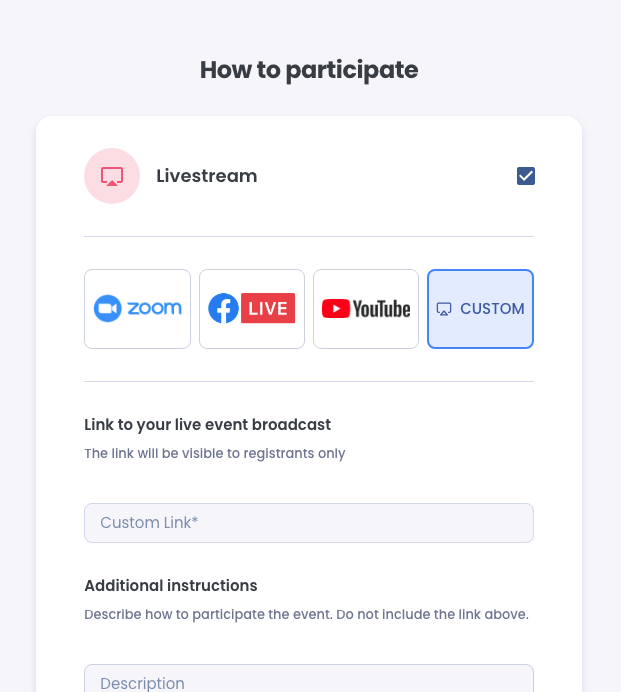
8. How To Partcipate: Online event — Use for events that happen online only.
1.Zoom – Integrate your Zoom account
2. Facebook Live
3. You Tube
4. Custom
5. Click “Save & Continue”.
Event details
PRO TIP
Here are instructions for setting up Zoom Events on Jlive.
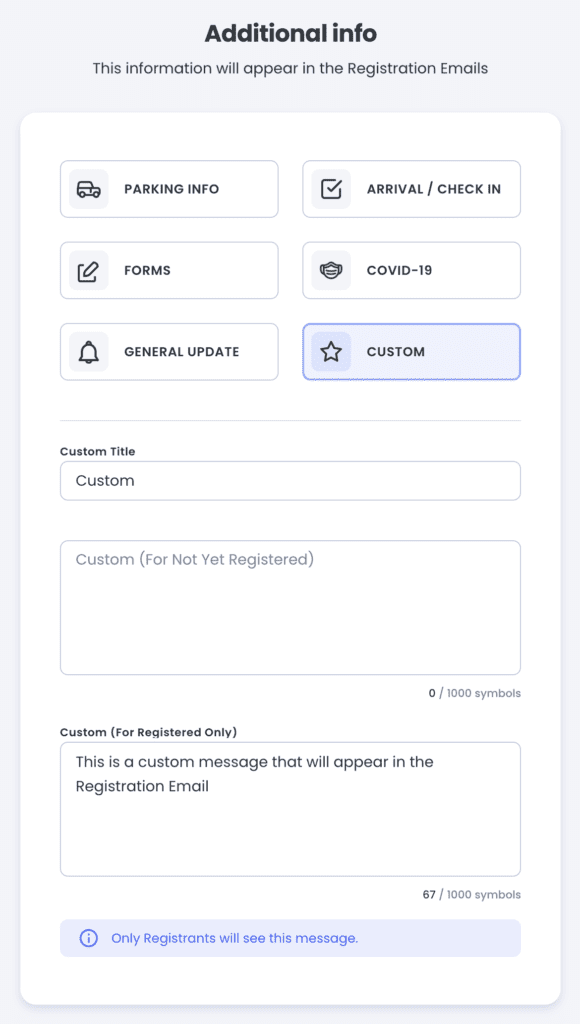
9. Custom Registration Message
You can add specific sections that will appear on the Event Details page. If you choose Custom, you can leave a message that will only be seen by Registrants if they are logged in AND also it will be included in the Registration Email.
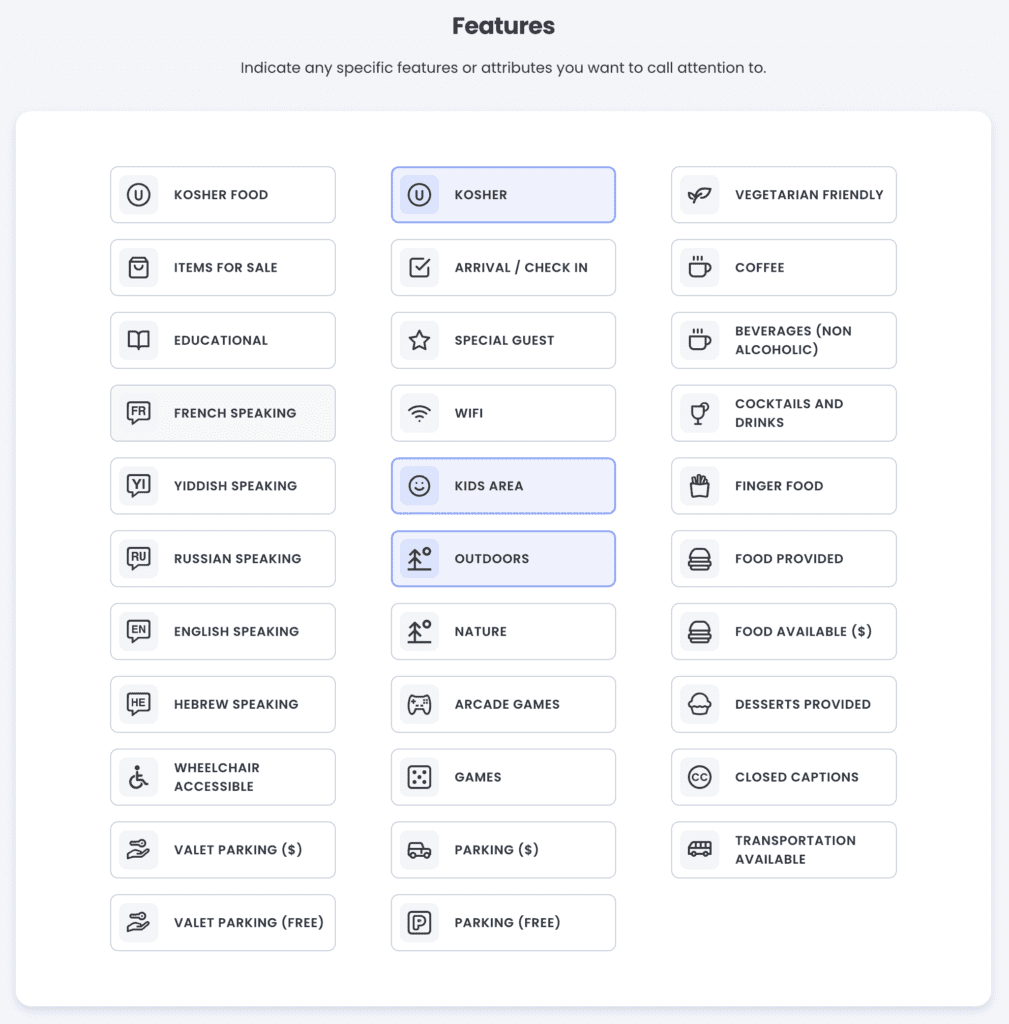
10. Chose the Event Features
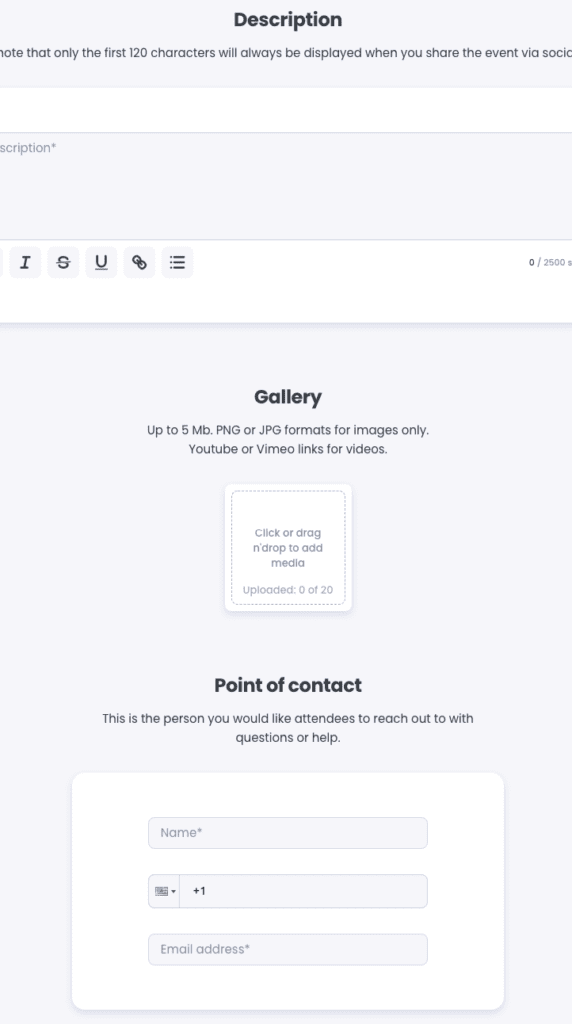
10. Write The Event Description.
- Write a description up to 2,500 characters that describes the most important details of your event. This lets people know why they should attend.
- Please note that only the first 120 characters will always be displayed when you share the event via social media.
- Description — Give more details about the information you included in your summary. This helps attendees get a sense of what they’ll experience at your event. A schedule, sponsors, or featured guests can improve the quality of your event listing.
11. Gallery
- Add images or links to Youtube / Vimeo videos.
11. Sponsors
- Upload logos of individual Sponsors. (Logos will not be clickable on the Event Details page.)
13. Point of Contact
- This is the person you would like attendees to reach out to with questions or help.
- Name
- Phone
14. Click “Save & Continue”.
Click “Save & continue”. Find more information about event details:
Create Tickets
1. Go to “Tickets” and click “Create Ticket”.
If you just finished the “Details” section, you’ll go to “Tickets” automatically. If you’re starting from a different location, go to your Manage Events page, choose the event, and select “Tickets”.
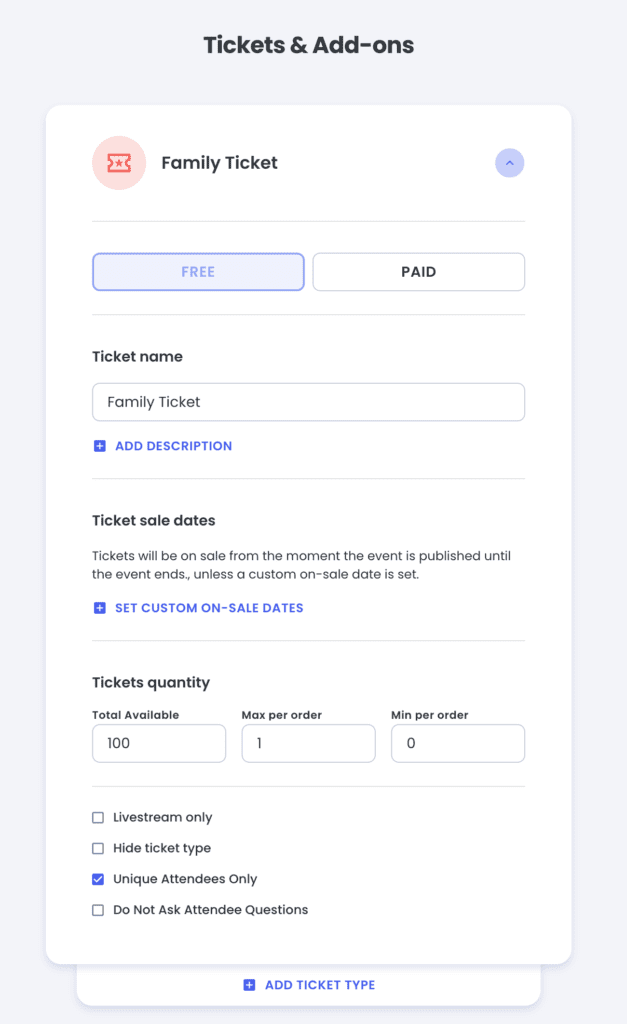
2. Enter your ticket information.
- Choose Free or Paid. (Paid Requires Stripe Account)
- Add Description
- Set Sale Dates – (Ex: Early bird ticketing window opens on 1/10/23)
- Set Ticket Quantity – Note you can set a Global Event Capacity in Ticket Settings lower on the page
- Set Max per Order
- Set Min per Order – (Ex: 1 Family Ticket must be purchased for each order.)
- Livestream Only – Used to NOT send the Ticket PDF in the Registration Email
- Hide Ticket Type – If you no longer want the ticket to be available to register
- Unique Attendees Only –
- Do Not Ask Attendee Questions – (Ex: Family Ticket should not ask First Name or Last Name of Registrant)
Ticket Settings
3. Donations
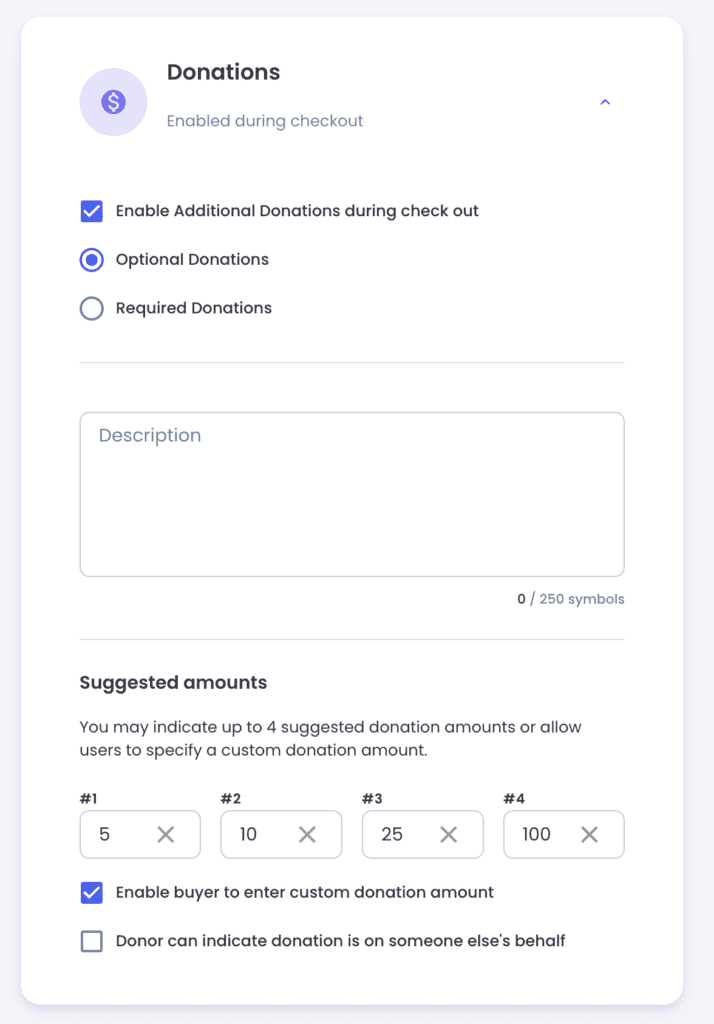
- Enable / Disable Donations
- Set Required or Not Required at Checkout
- Add Description
- Set Suggestion Donation Amounts
- Enable Custom Donation Amount
- Allow Donor to donate on someone else’s behalf
4. Ticket Settings
- Set Button Text – (Ex: Register, Volunteer, More Info…)
- Use 3rd party link – Bypasses Jlive Registration and sends user to another website
- Offline Payment – Allows Registration to paid events without credit card charge. The organization must collect payment on their own outside of Jlive, and they can mark as paid later.
- Total Event Capacity – (Ex: Adult Tickets 50 available, Child Tickets 50 available, but if total Event Capacity is 50, then you can sell more than 50 tickets total.
Click “Save & continue”.
For more information see the following: Create Tickets and Create Paid Tickets.=
Create Registration Questions
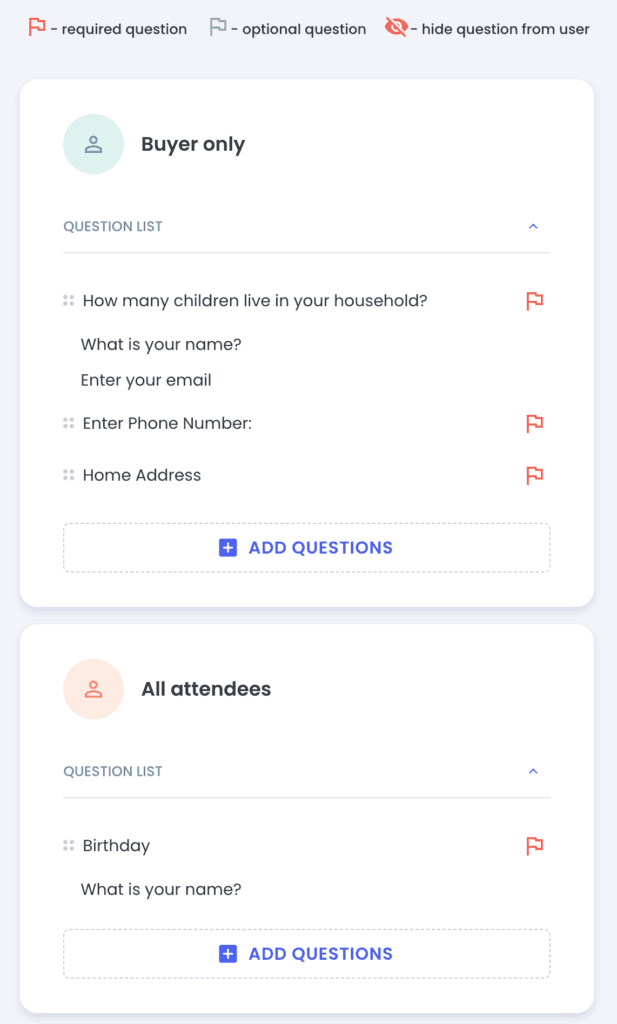
Choose who to direct questions to. The “Buyer” is the person using Jlive to Register. The Attendee may be different from the Buyer. (Ex: A parent registering their child to an event).
Add Default Questions

Add Question from Question Bank
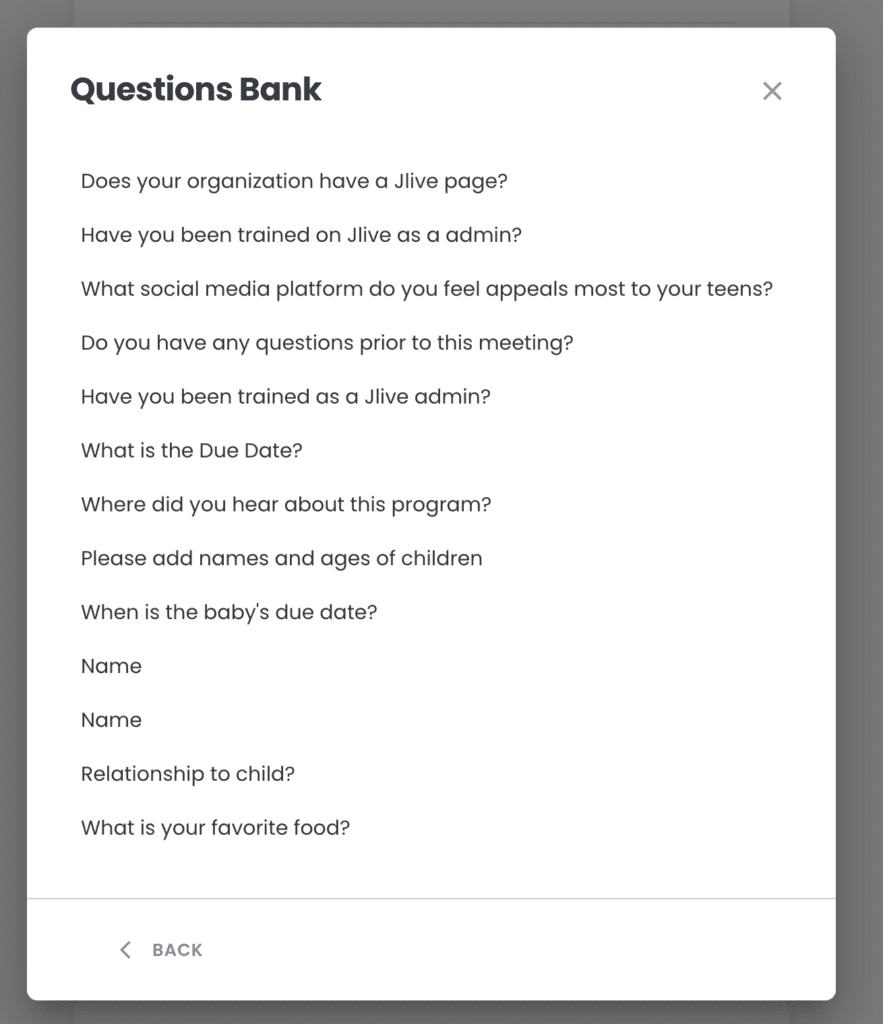
You can also Manage your Organization’s Question Bank.
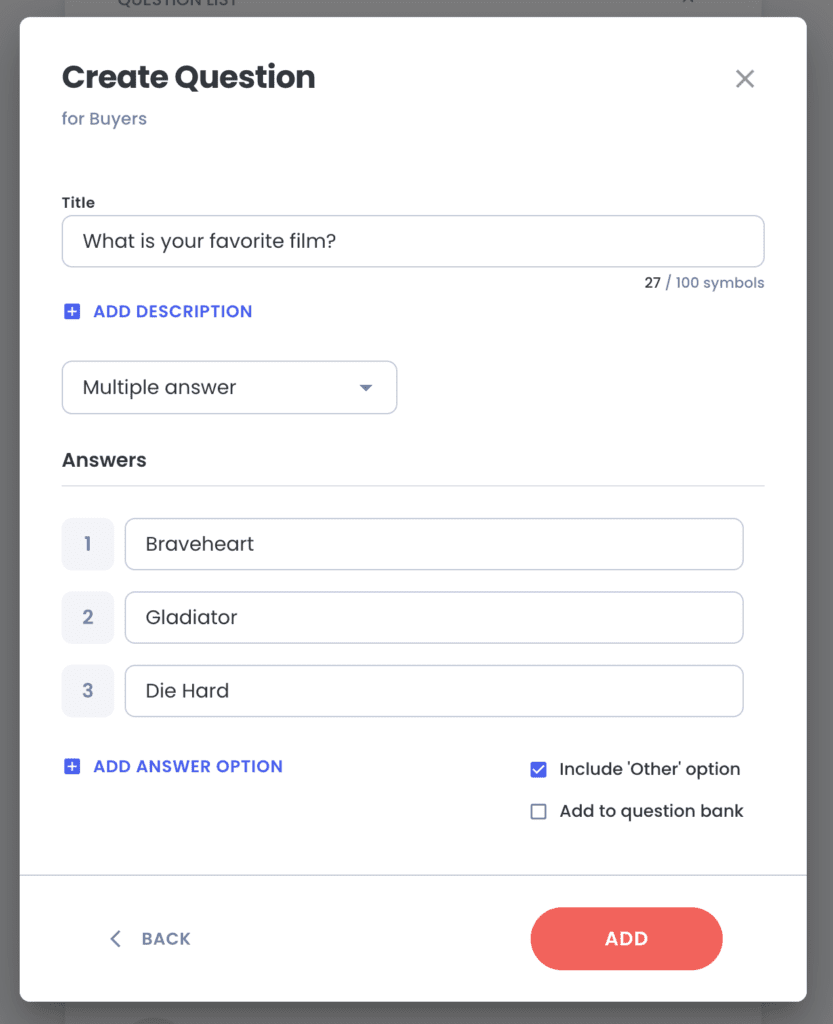
Create New Question
Review the following under “Order Options”:
Translations
Translations are only required in Montreal at this time. On this step, you will be asked to enter French translations for all of the custom text in your event, tickets, and registration questions.
Settings
Review your privacy settings.
Go to “Privacy Settings” and click “Privacy”. Then choose “Public” or “Private”.
Publish
Select “Publish Event” (at the top of the page) and choose whether to “Publish Now” or “Schedule Publish”.
Publish Now — publish the event immediately. Once set, the event is live and you can still make changes.
Schedule Publish — set a future date and time for the event to go live. Once set, you’ll see “Scheduled” (at the top of the page) and have options to reschedule, unschedule or publish now.
#eventplatform #jewishevents #jewishmontreal #jewishmtl #jlive #montreal #montrealevents #montrealjudaism #mtl #museumofjewish #passover #passoverevents