


1. Go to your Create Event page.
2. On Step 2 – Tickets, Create a “Waitlist” Ticket.
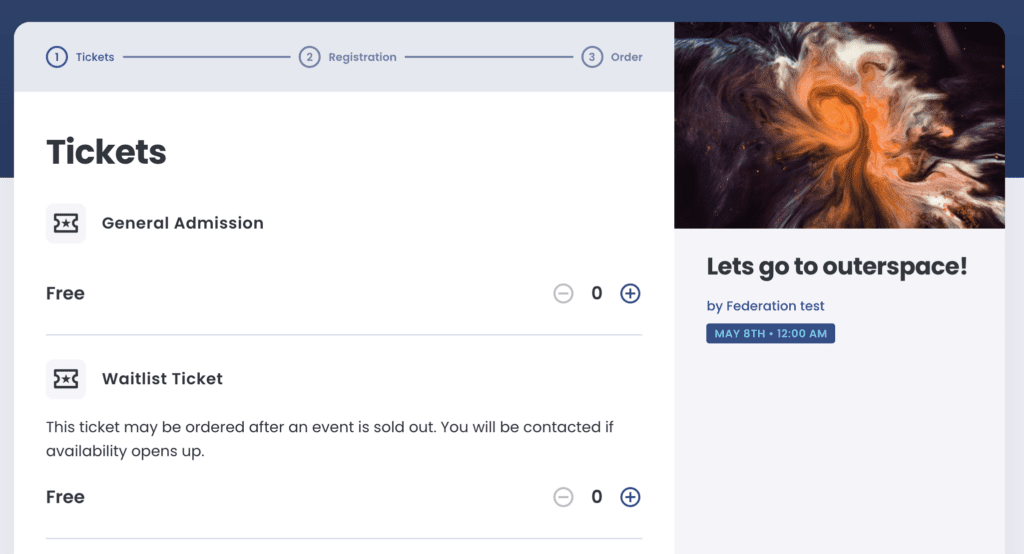
Label a ticket type “Waitlist Ticket” use the description to explain that this ticket may be ordered after an event is sold out.
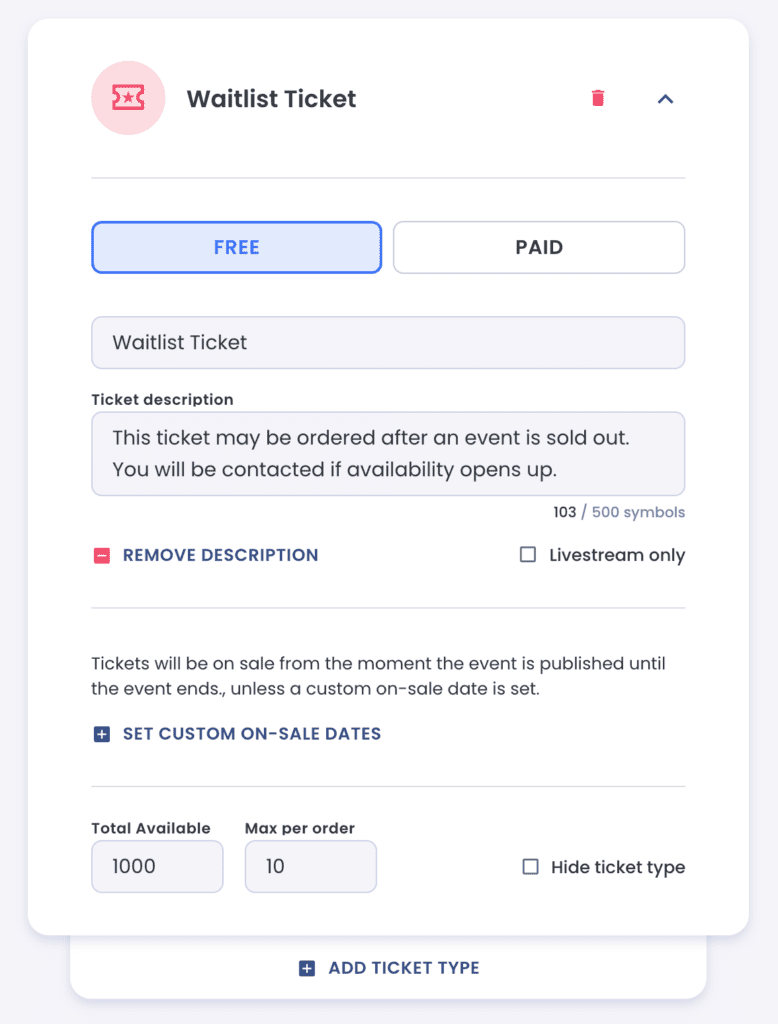
3. Limit the waitlist to a maximum number of people.
TIP: If you don’t have a limit on the number of attendees who can be added to your waitlist, set this field to zero.
4. Optional: Collect phone numbers from attendees.
If you want to collect information for each Waitlist Ticket, then on Step 3 – Questions you can add questions to the Waitlist Ticket Type.
Find the “Specific Ticket” box and then the “Waitlist Ticket”
Then Add Questions for this specific ticket type.

*This option is a work-around until a fully automated Waitlist feature is available. This is on our list of features to implement.