


Jlive has implemented a new way of collecting payments! Organizations are now able to connect to the Payment Gateway of their choice using their existing accounts with these Payment Gateways.
Organizations can now:
- Use existing accounting workflows with your own Gateway
- Utilize existing transaction rates
- No additional fees from Jlive at this time
Currently Jlive supports Stripe and Moneris. Support for Authorize.net and Paypal coming soon! If you have a specific Payment Gateway you would like to use, please check to see if it is supported by Spreedly. If it is, then Jlive should be able to activate this for your organization. Spreedly – Supported Payment Gateways
How it works:
Spreedly is a service that allows Jlive to securely store credit cards and use them to transact against any number of payment gateways and third party APIs. It does this by simultaneously providing a card tokenization/vault service as well as a gateway and receiver integration service. Payment methods tokenized by Spreedly are stored at Spreedly, allowing Jlive to securely initiate payments through different payment gateways, all without ever seeing or storing credit cards on Jlive servers.

Note: Under the previous payment system, Jlive used a service called Stripe Connect which routed payments through Jlive’s Stripe Account and limited visibility into reports for organizations. Under the new system, according to Stripe, organizations can no longer use their Stripe Connect account. Instead, they must create a fresh Stripe account by visiting Stripe.com and signing up for a new account.
How to Connect Payment Gateway via Spreedly
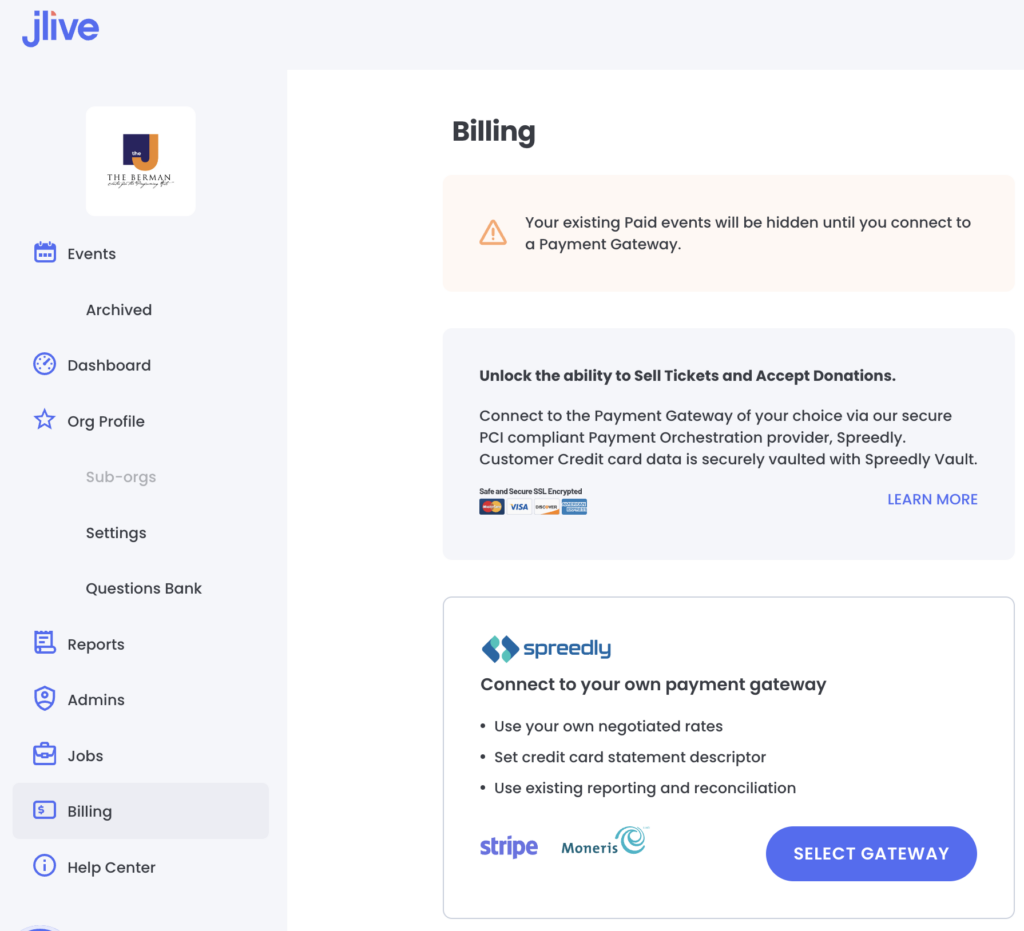
On The Organization / Billing page, there is a section called Spreedly.
Spreedly is a Secure Payment Orchestration platform that allows you to connect to your own Payment Gateway in order to sell on Jlive. Learn More
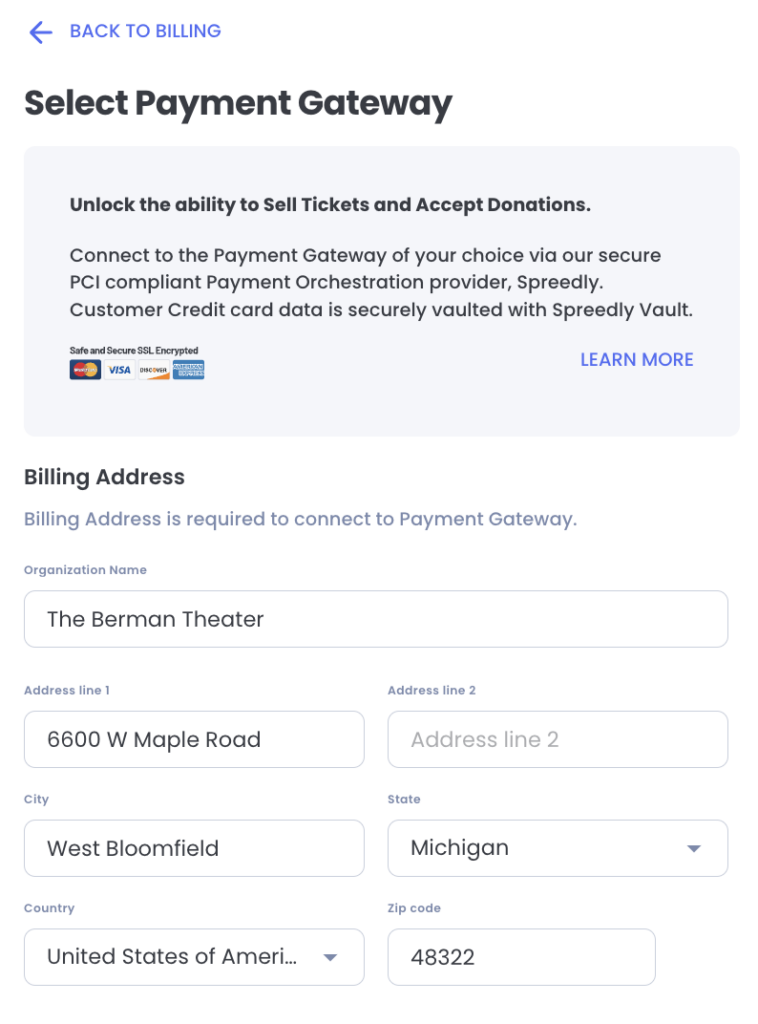
1. Press the Select Gateway button.
2. Press Enter Billing Address
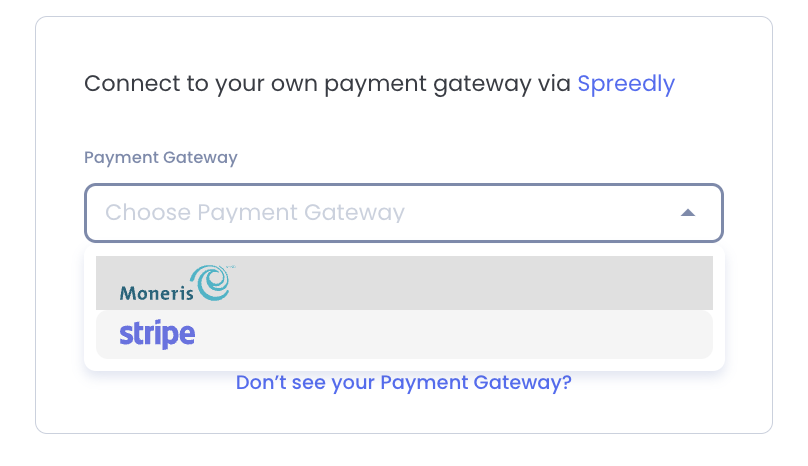
3. Choose Stripe in the Payment Gateway
Connect to Stripe
Note: You can NOT use your existing Stripe Connect account with Spreedly. It must be a regular account from Stripe.com. Some organizations have indicated they were able to use their Stripe Connect account by logging into Stripe and searching for the word “API” in order to obtain the Secret Key listed below…
1.Choose Stripe in the Payment Gateway
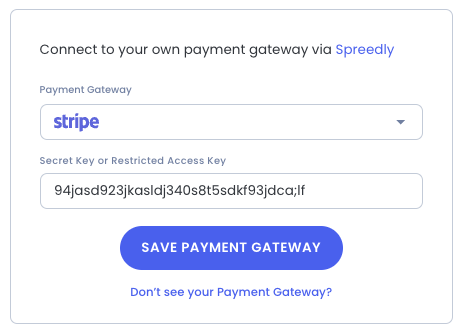
2. Enter the Secret Key and Save Payment Gateway
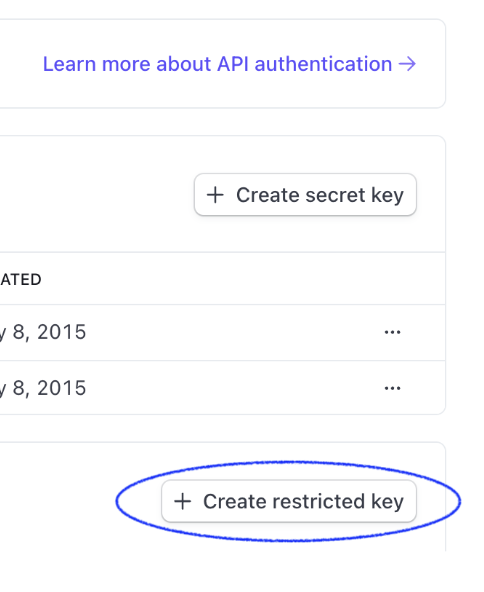
Starting June 2024, Stripe will require the use of Restricted API Keys (RAK) on all gateway connections with Spreedly.
1. Login to your Stripe dashboard and visit the API keys area (dashboard.stripe.com/apikeys)
2. Select the “+ Create restricted key” button. If you already have a RAK provisioned for your Spreedly connection, you can edit that key instead and proceed to the next step.
3. Spreedly requires the following permissions on all RAK to facilitate transactions. They are found in the “All core resources section”, and one in the “All webhook resources” section. Ensure these permissions are set to Write to avoid disruption to transactions on your Stripe gateways.
- PERMISSIONS: Charges, Customers, PaymentIntents, PaymentMethods, SetupIntents, Tokens, Webhook Endpoints
- CONNECT PERMISSIONS: Charges, Customers, PaymentIntents, PaymentMethods, SetupIntents, Tokens
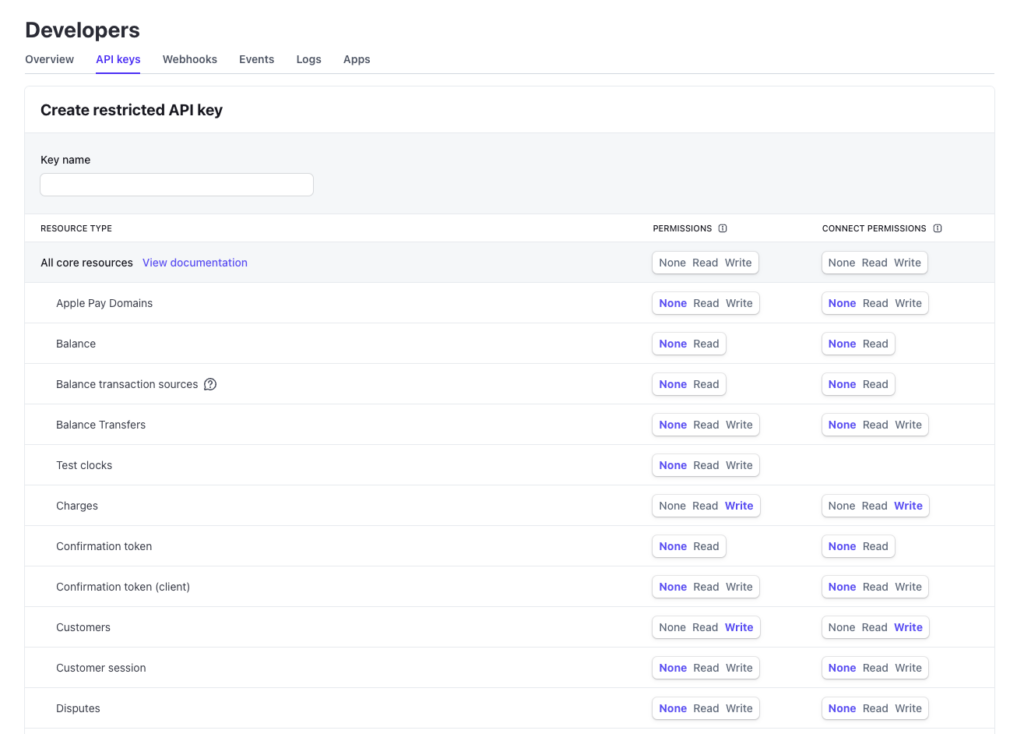
4. Save your new RAK using the “Create key” button below permissions, or save these updated permissions on your existing RAK using the “Apply changes” button.

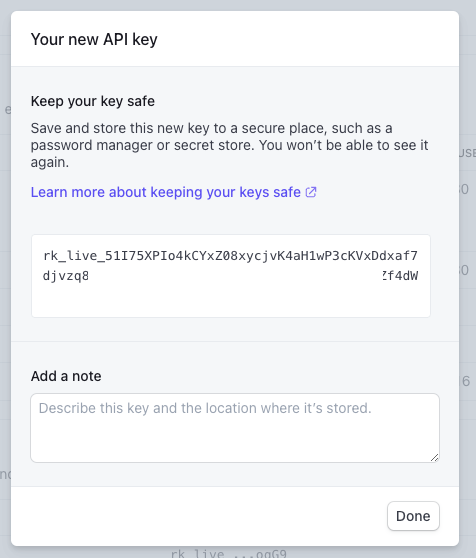
5. Reveal the key in your list and copy your RAK to clipboard.
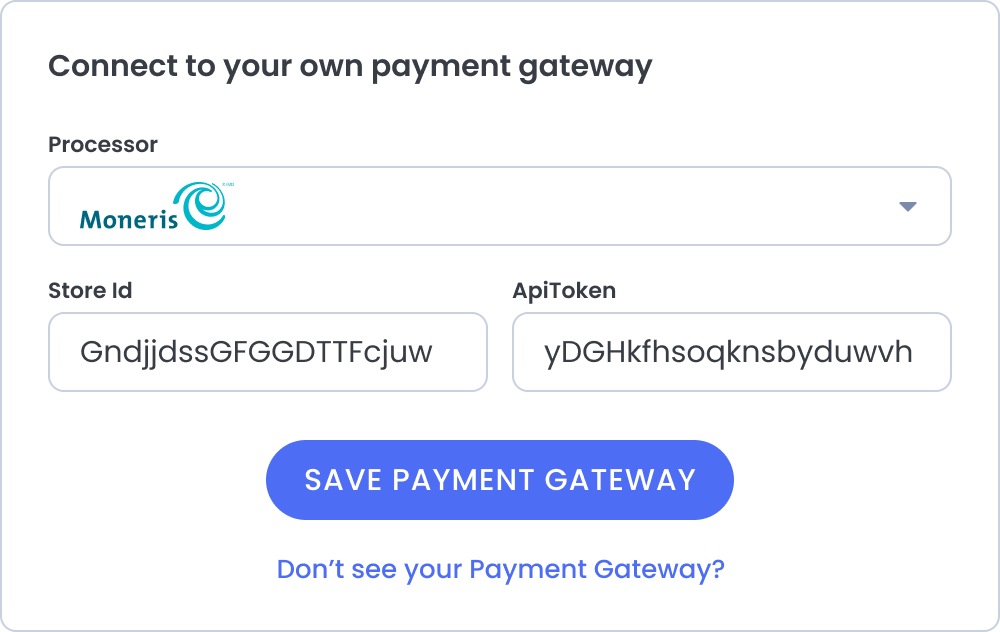
Connect to Moneris
Moneris is a Payment Gateway that is often preferred in Canada due to its faster payouts and competitive rates.
1.Choose Moneris in the Payment Gateway
2. Enter the Store ID and API Token and press Save Payment Gateway
1) To find your Store ID and API Token, log into the Moneris Go portal, and access the store containing the API token that you want to view or copy (see Logging into Moneris Go portal).
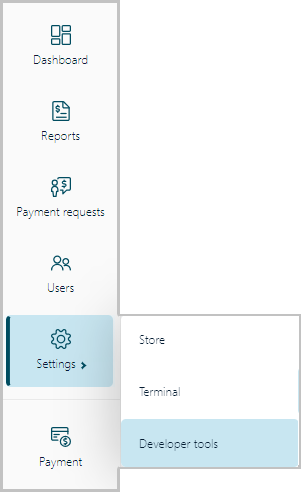
2) On the sidebar menu (shown below), click on Settings > Developer tools.
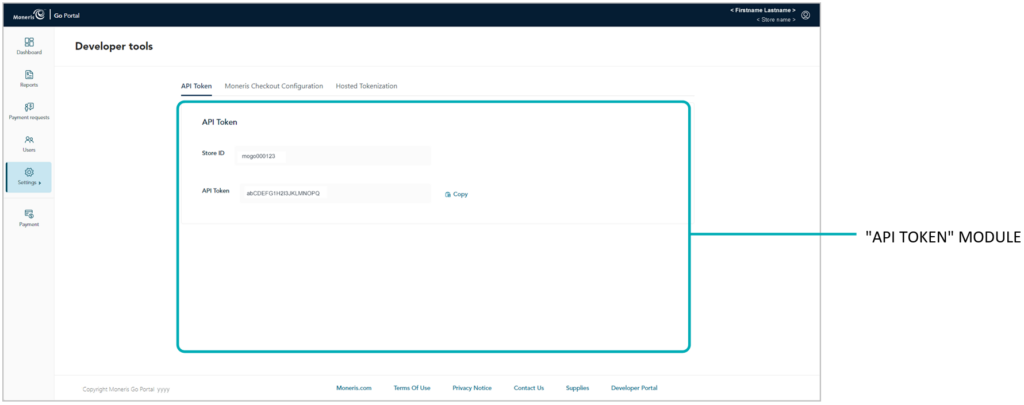
3. When the “Developer tools” page displays, you should see the “API Token” module (shown below), which lists your store’s API token and store ID.
Learn more: Moneris API Token
Connect to Authorize.net
Authorize.net is a Payment Gateway that is owned by Visa.
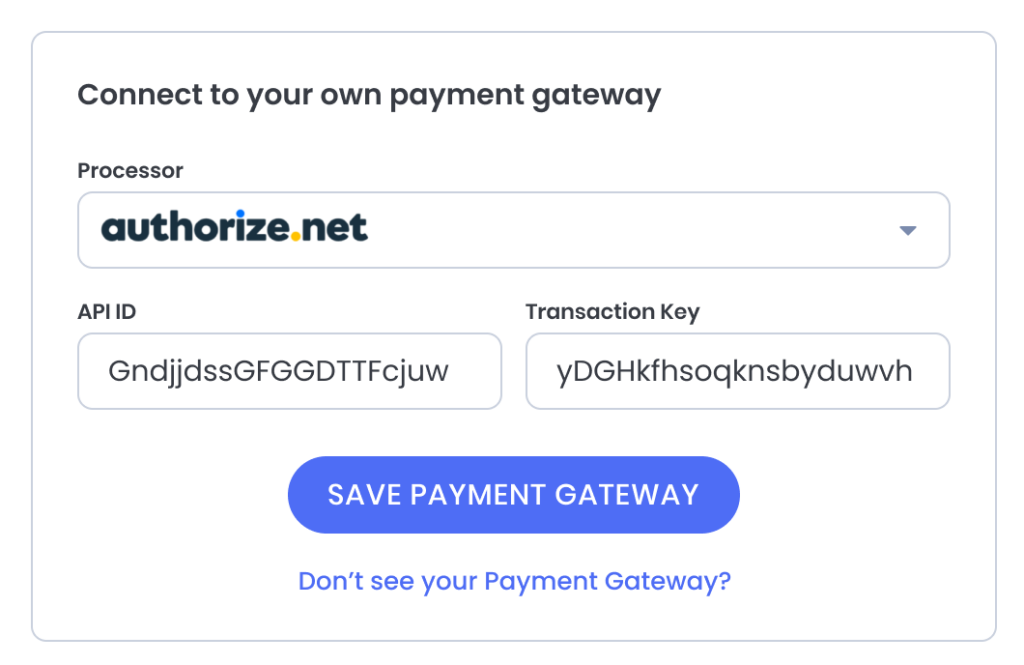
1. Choose the Authorize.net Gateway.
2. Enter the Secret Key and Save Payment Gateway
How to find your Authorize.net API ID and Transaction Key –
Steps to Generate Your API ID and Transaction/Signature Key
- Sign into the Merchant Interface.
- Select Account from the main toolbar.
- Under Security Settings, select API Credentials & Keys.
- Based on the need and integration, select New Transaction Key or New Signature Key.
- To disable the old Transaction or Signature Key, check the box labeled Disable Old Transaction/Signature Key Immediately.
- If the Disable Old Transaction/Signature Key check box is not selected, the old Transaction or Signature Key will automatically expire in 24 hours. This will also impact any use of the Signature Key for transaction response validation for the SHA2 field. If the old Transaction/Signature Key is not expired, the previous key will continue to be used for the hash/response validation.
- Select Submit to continue.
- Request and enter PIN for verification.
- Your new Transaction/Signature Key is displayed.
Steps to Generate Your Public Client Key
- Sign into the Merchant Interface.
- Select Account from the main toolbar.
- Under Security Settings, select Manage Public Client Key.
- To disable the old Public Key, check the box labeled Disable Old Public Key(s).
- If the Disable Old Public Key(s) check box is not selected, the old Disable Old Public Key(s) will automatically expire in 24 hours. If the old Disable Old Public Key(s) is not expired, the previous key will continue to be used for the hash/response validation.
- Select Submit to continue.
- Request and enter PIN for verification.
- Your new Public Client Key is displayed.