


If your organization uses Hubspot as your CRM, its easy to export the files you need from Jlive to import them to Hubspot.
Hubspot allows you to store different standard CRM objects such as: contacts, companies, deals, tickets, as well as create custom objects.
The most common way to import Jlive data is to import Event Registrants as Contacts using the Import One Object bulk importing process.
How to export Attendee CSV from Jlive
First, you will need to gather a list of the Registrants that you would like to import. Typically this is done by going to the Manage Event page on any event and visiting the Attendees page. Here you can find the download CSV button.
See: How to download Attendee CSV
How to Import One Object into Hubspot
Here are Import Instructions on the official Hubspot website. Or you can please read below.
Import records
To bulk create or update one object (e.g., contacts):
- In your HubSpot account, navigate to your contacts, companies, deals, or tickets.
- In the upper right, click Import.

- Click Start an import.
- Select File from computer, then click Next.
- Select One file, then click Next.
- Select One object, then click Next.
- Select the object in your import file.
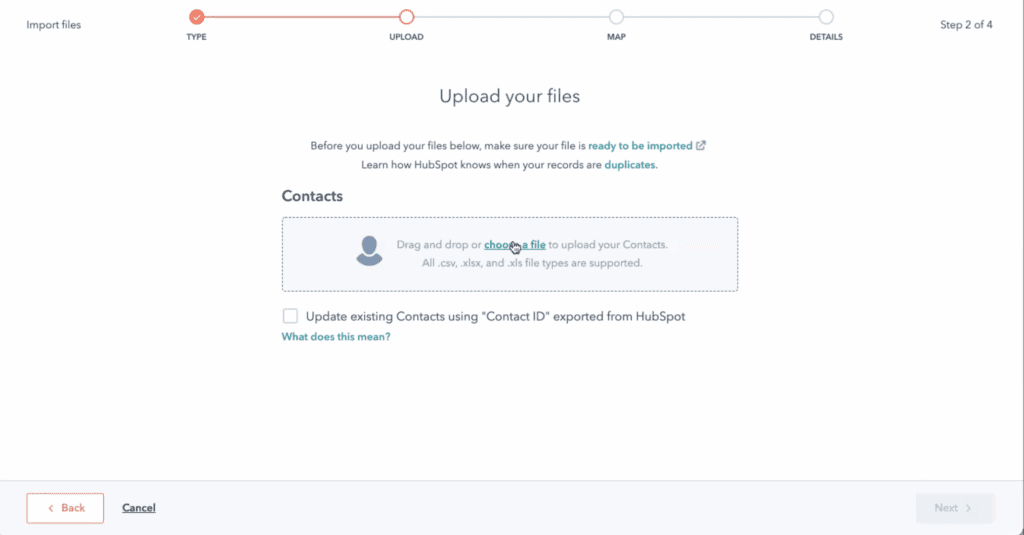
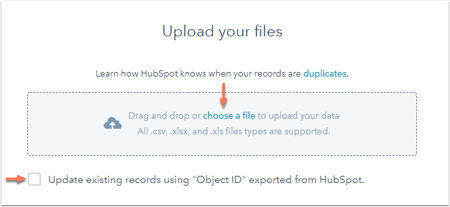
- Click choose a file and in the dialog box, select your import file. Select the checkbox if you’re using the object ID to deduplicate your contacts, companies, deals, tickets, products, or custom objects. In the bottom right, click Next.
- On the Map columns in your file to [object] properties screen, HubSpot will match the columns in your file to your selected object’s properties based on the header and the property name. You’ll see a preview of the property values from your spreadsheet in the Preview Information column.
- If any columns do not match an existing property, click the corresponding dropdown menu in the HubSpot Property column. You can opt to do one of the following:
- To map the column to an existing property, select an existing property.
- To set up a new custom property, click Create a new property, then set up your new property in the right panel. The data in the column will now be mapped to this new custom property.
- To skip importing this column, select Don’t import column. To skip importing data from all unmatched columns, select the Don’t import data in unmatched columns checkbox in the bottom right.
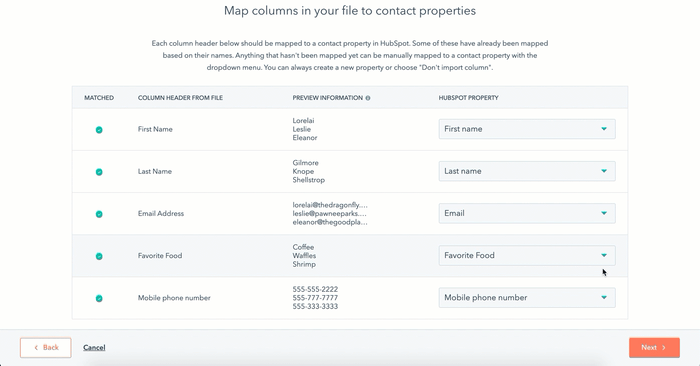
- Once all columns are mapped to a property or set to Don’t import column, click Next.
- On the details screen, enter an Import name.
- If you’re importing contacts:
- To automatically create a list when the contacts are imported, select the Create a list of contacts from this import checkbox.
- To agree that contacts expect to hear from you and that your import file does not include a purchased list, select the checkbox. Learn more about HubSpot’s acceptable use policy.
- If you’ve turned on General Data Protection Regulation (GDPR) functionality in your account, use the Set the legal basis for processing a contact’s data dropdown menu to select a lawful basis of processing.
- If you’re importing contacts:
- If you’re importing a file with a date property, use the Date format dropdown menu to confirm how the date values in your spreadsheet are formatted.
- Once you’ve set the options for your import, click Finish import in the bottom right.
You can view, analyze, and complete actions with your previous imports. Learn how to create a list, review import errors, or view and delete imported records.